
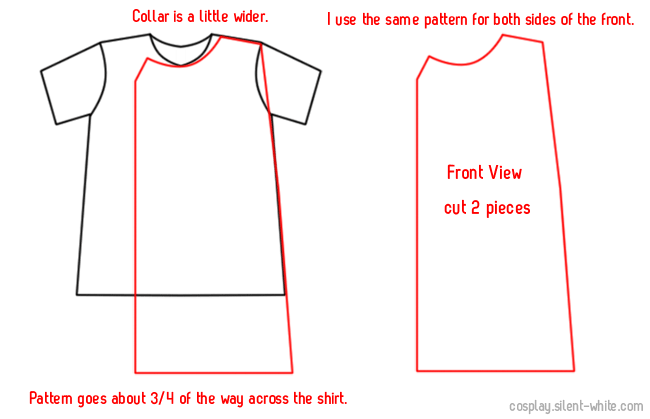
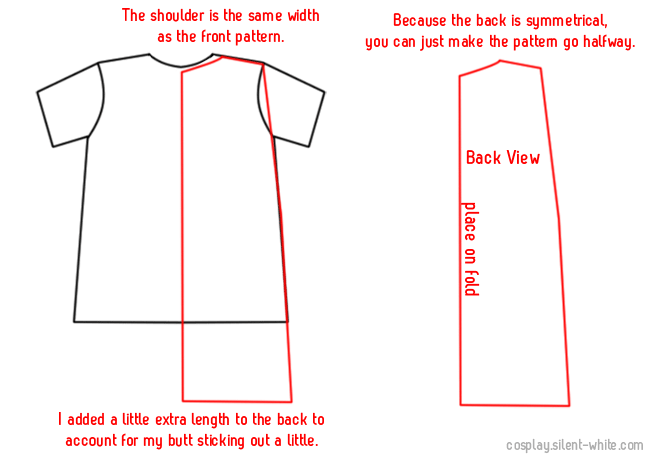
I’ve been asked questions about my Haku costume, so I thought I’d go into more detail on how I drafted the patterns :) To start, I’ll do his white top. (View previous entry on Haku’s top.) Here is a flat view of the front and back:
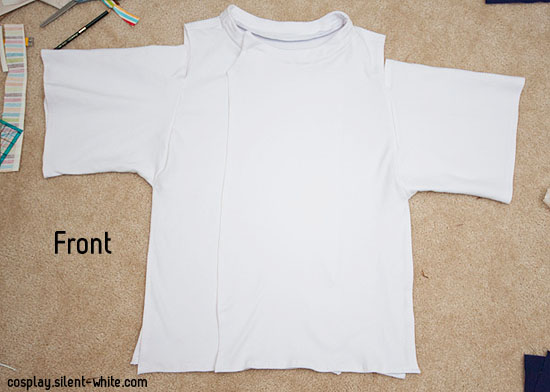
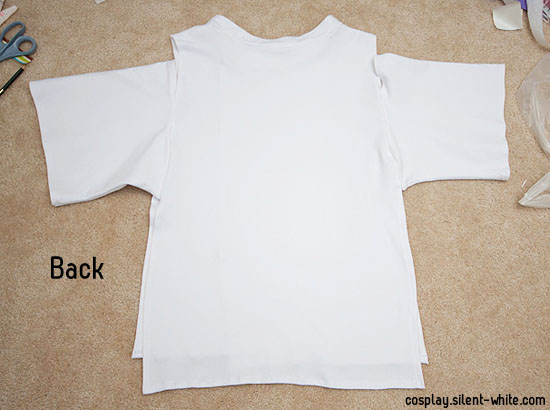
The problem with Haku’s outfit is that I really couldn’t think of a good pattern to alter. When that happens, I typically use my own clothing to base my patterns off of. For his top, I actually used one of my T-shirts. You can kind of see how they relate when I lay my T-shirt over it.

NOTE: I didn’t get this pattern right on my first try! I recommend doing a test run with test fabric (like cheap muslin) before going at it for real.
A couple things about Haku’s top…
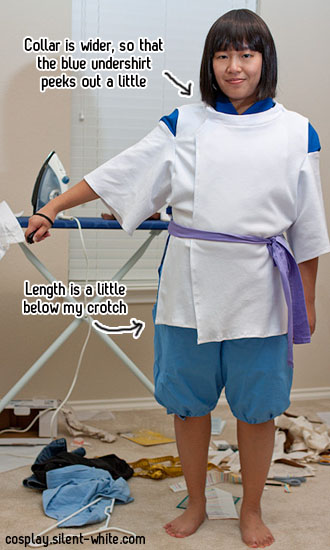
To simplify things, I’m going over the pattern without the collar and sleeves. I chose a shirt that was a little loose fitting since the white top is the 2nd layer of clothing. (Well, 3rd since I’m wearing a compression vest too.)
The front and back are sewed together only at the shoulders. The sleeves are sewn partially on both sides, leaving a slit between the front and back.
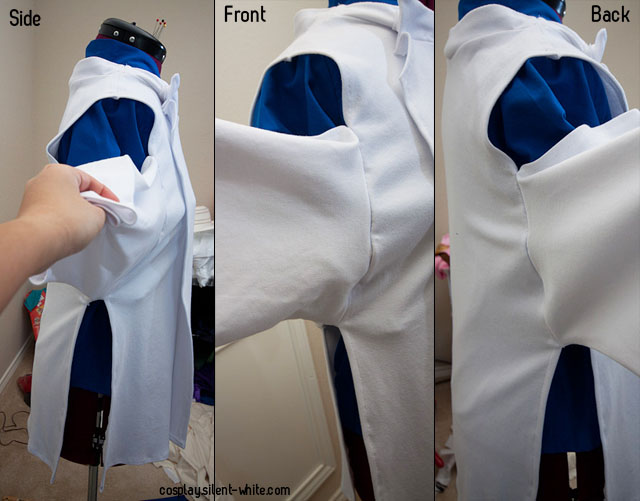
The front layers stay together with velcro that is stitched on the collar, as shown in my previous entry. I already wrote this before, but just a reminder!
1. On the front layers, the left goes over right.
2. The sash is tied on the left side.
I hope this was helpful! I may go back and do the same for the undershirt and pants :)
This was EXTREMELY helpful! Thank you SO much!
So Ive made the psttern for my cosplay, buuuut……I dont know how to do the sleeves. Help?
You’re welcome! I’m glad this post was helpful!
As for the sleeves, the pattern is like a rectangle, like in my other post:
http://cosplay.silent-white.com/2010/09/19/hakus-top/
(That little tab I originally drew isn’t really needed.)
I just measured how long I wanted the sleeve, and then how much I wanted it to droop down. After you sew the ends together, you sew part of it to the front and back, such that it leaves a slit on the top and bottom.
Hey this is very nice! i was wondering how you make the collar stand up and stand out since i want to make my own chihiro outfit~ thanks in advance
I actually didn’t do anything special to make it stand up :) There are two pieces of velcro inside the collar, so that it comes together. That seemed to make it stand up on its own!
Muchas gracias por tus instrucciones, me ha ayudado mucho ya que es la primera vez que hago ropa. Solo me queda por terminar la parte superior. Un beso grande.