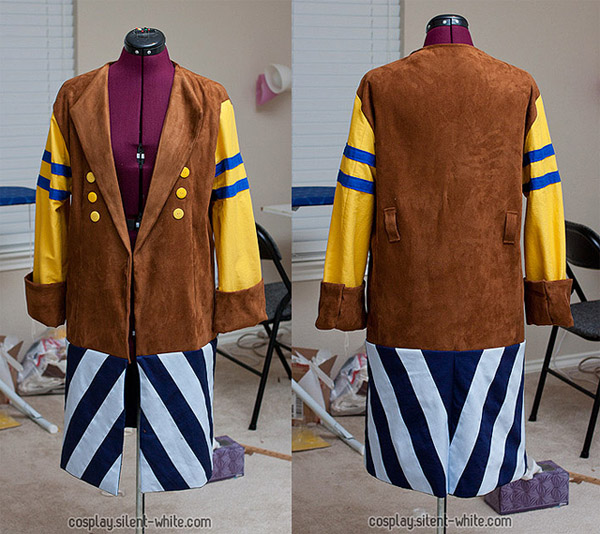
I decided that after I finish each costume, I should write a post summarizing how I created it. That way everything is in one place :) Let’s start with Zulf’s jacket!
Materials
- Main body = “rust” colored suede
- Sleeves = yellow twill
- Stripes on sleeves = blue quilter’s cotton (same fabric as vest and skirt)
- Stripes on bottom = blue twill, white twill, dark blue broadcloth
- Vest = blue quilter’s cotton
I bought the suede at fabric.com, and the rest were just at my local fabric stores like Hancock and Joann.
Pattern
I used Kwik Sew #3485, which is a men’s blazer pattern.

Alterations I made are…
- Back: removed the vent
- Sleeves: added more room near the armpit and altered the cuffs at the end of the sleeves
- Collar: extended it so it looks like Zulf’s
- Pockets and buttons: ignored all parts relating to these
- Overall: adjusted the length to account for the stripes on the bottom
I didn’t use a pattern for the vest. I just modeled it after a shirt without sleeves.
The Making Of…
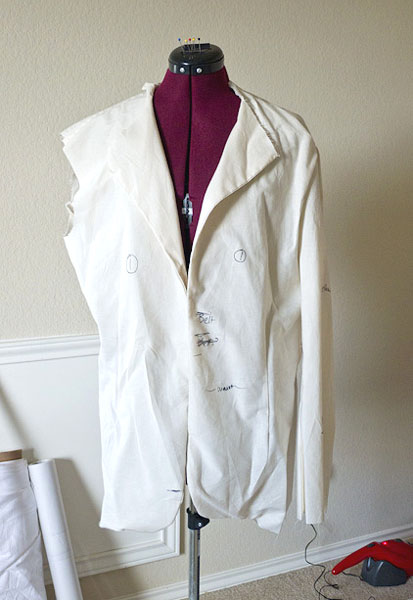
I started by making the blazer pattern (without changes) on muslin. I got James to wear the mock-up, so I could see where things fell on him. From there, I was able to see where to shorten and take in.
After making the jacket, I added a couple things to the body. On the back, there are 2 belt loops, mainly to help line up where the belt should be.

The front has 3 buttons on each side. They’re just cosmetic and don’t have matching button holes.
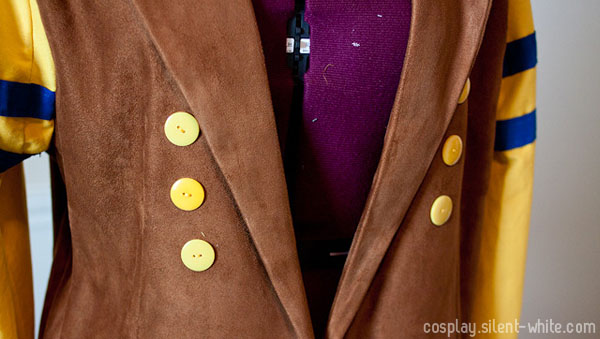
Though I originally added a clasp to the inside of the jacket, I’ve decided to take it out. When James wore the jacket, the belt held it together fine, and the clasp was actually kind of in the way.
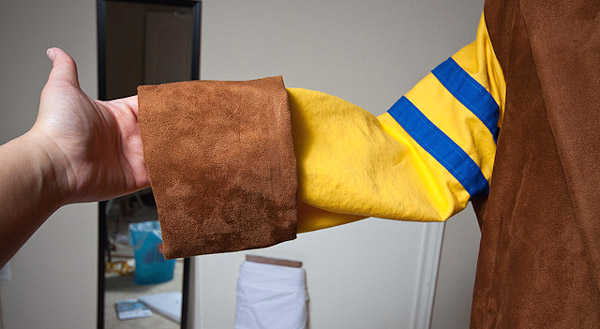
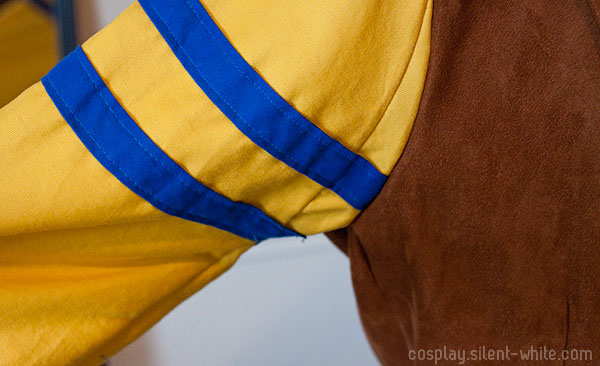
On the sleeves, I just cut the yellow part to where Jame’s wrists were, and then extended it with the brown part. It’s the same suede as the jacket body, though lined with twill, so I didn’t have to use so much of the suede.
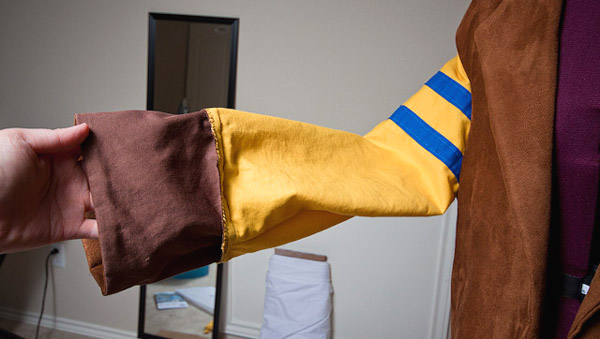
It just folds back and stays there without anything extra.
Near the armpit, I extended it a little. I didn’t have enough fabric to make new sleeves, so I just added an extra part to give a little more movement room there. The stripes on the sleeves are just strips of fabric I cut from the fabric I bought for the vest and skirt.
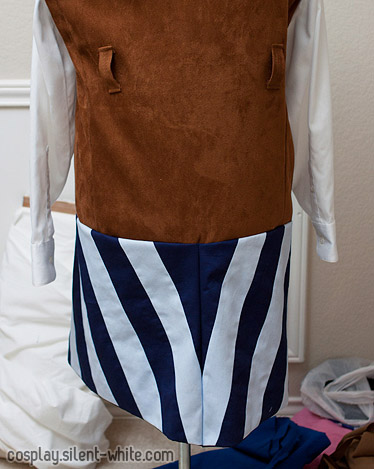
For the stripes at the bottom, I really did just cut strips of fabric and sew them together. The white stripes were custom dyed so that they’d have a blue tint. Each stripe is 2in wide. They look like this before being put on the jacket.
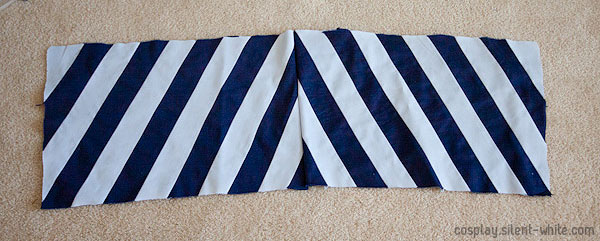
This is how they meet up in the back:
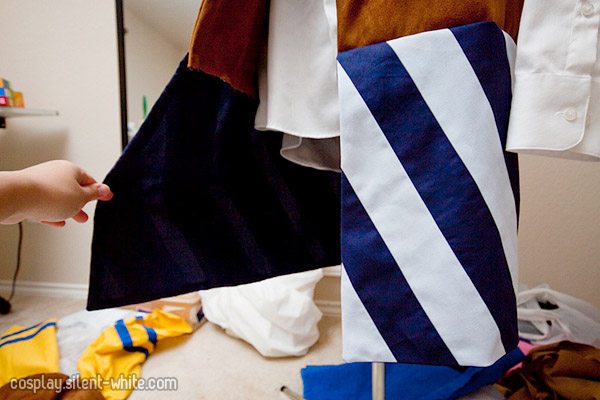
And they are lined with a dark broadcloth:
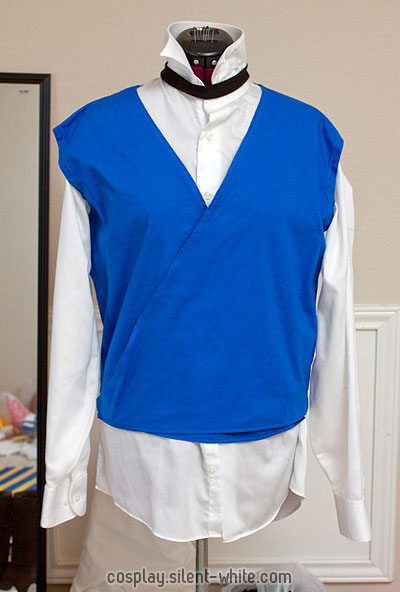
As mentioned, I just drafted my own pattern for the vest. The back is basically the back of a shirt without sleeves, and the front is a triangular pattern that overlaps each other. Since I didn’t have James try this on beforehand, I used strips of velcro to close the vest. That way it was adjustable.
That’s it for the jacket parts! I will have another entry just on the skirt.
I’ve always admired your work! This one came out great :)!
Just a question on the stripes though, how did you dye it? Did you just use painters/masking tape to create the stripes and dyed it?
Thanks!
Thank you! I’m glad you like my works! :D
The stripes are actually 2 different fabrics. One was blue, and the other was white. I dyed the white one before I started using it. I then cut both into strips and sewed them together to make the striped pattern.
Continued question about the stripes: Yes, you dyed it before you started using it. But HOW did you dye it? What method did you use?
I always like using liquid Rit dye and the sink/bucket method:
https://www.ritstudio.com/techniques/the-basics/sink-or-bucket-technique/
I started with white fabric and then used a plastic container for the hot dye bath. I can’t remember how much dye I used, but I basically kept an eye on the fabric as I stirred it in the dye bath, so it wouldn’t get too dark.
After it was dyed, cleaned, and dried, I cut it up into strips for the stripes.