Archive for the 'Kiki' Category

Making a witch’s broom

You know, with how popular witch costumes are for Halloween, you’d think it’d be easy to buy a witch’s broom, right? WRONG. Every witch’s broom I found was either children’s size or absolutely terrible looking. I figured… why not make my own?

I was able to do it by buying two things:

  1. a broom handle (stick only, no broom head)
  2. a big spool of raffia paper ribbon

I cut a bunch of raffia ribbon. I even brought the spool to work with me to cut some when I had some down time. I grouped them into four bunches, tying each one near the top with raffia ribbon.

4 bundles of raffia paper ribbon on the floor with a broom stick

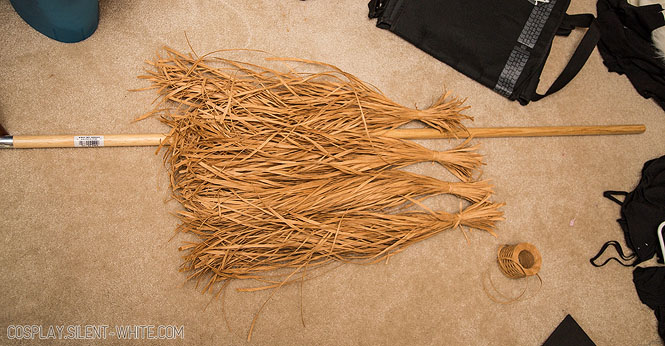
When it’s split up into smaller groups, it’s a lot easier to handle! From here, I hot glued them to the broom handle, putting the glue on where I tied the bunches together.

4 bundles of raffia paper ribbon glued around the bottom of a broom stick

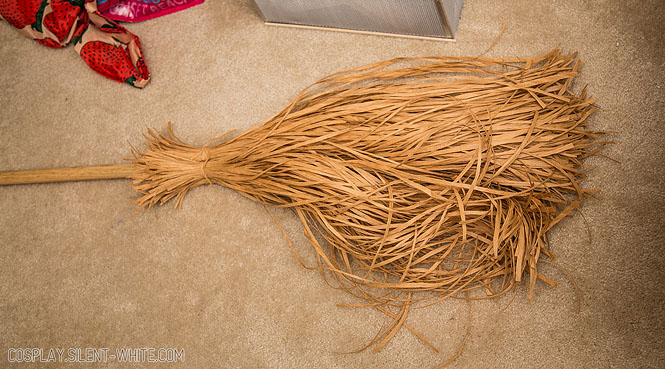
For the finishing touches, I just secured the raffia ribbon by tying more ribbon around it. I did it in two places to match how Kiki’s broom is tied.

Custom witch's broom with raffia paper ribbon for straw

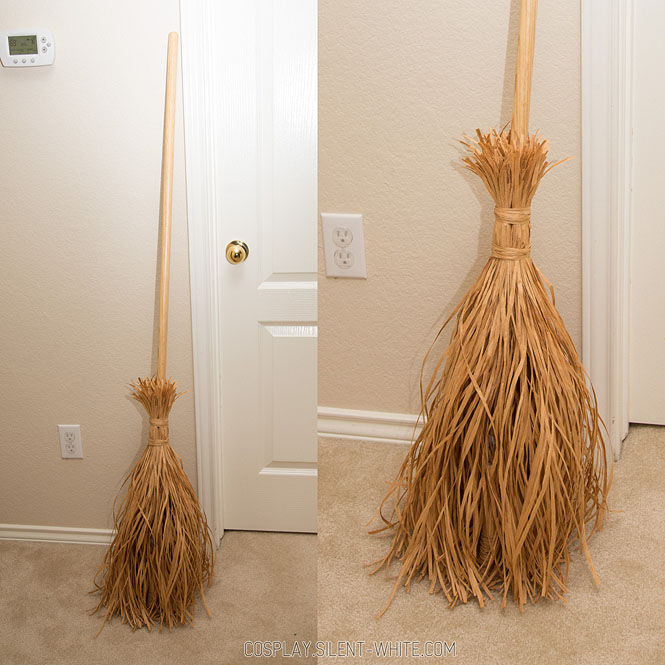
And that’s it! Very simple to make, doesn’t need much material, and pretty cheap! Plus, looks much better than the witch’s brooms you can buy!

Kiki’s bag

When making Kiki’s bag, I had a hard time deciding on what color it should be! Looking at screenshots, sometimes it looks pink, and sometimes it looks brown. In this case, I’d normally custom dye my fabric to get the exact color I want, but I knew I didn’t have time for it this time. So, off to the fabric store I went!

I settled on a brown suede fabric. I originally liked it for the color on the smooth side, but after taking it home and staring at it more, I decided I liked the fuzzy suede side more.

Black dress on a dressform with a brown suede bag over the shoulder

But first! Let’s back up and start from the beginning with the pattern.

Four sewing pattern pieces for a bag with measurements

Read the rest of this entry »

Big red bow

Next up is Kiki’s red bow! I thought about buying a headband with a red bow already on it, but I had some leftover red cotton fabric I wanted to use up, and I also wanted the bow to be bigger.

To start, I made 4 rectangles and ironed on heavy weight interfacing to two of them.

4 rectangles of red fabric, 2 with interfacing

I was a bit ambitious on making them big, and I actually made them too big at first. After adjustment, each rectangle ended up being 10.5 x 5 in (before adding seam allowance).

(Note: I didn’t take as many photos while making the bow, so I’ll do my best to describe what I did!)

I sewed the interfaced pieces to the non-interfaced pieces, just along the long edges (top and bottom), with the interfaced side out. This way, I could flip them inside out and have the interfacing be on the inside.

Then I sewed the two pieces I get after that together at the short edges, making a loop.

Red fabric sewn together as a loop

I made a simple ribbon for the middle, measuring 1.5 x 6 in (before adding seam allowance), which forms a 3/4 in wide ribbon after sewing the long edges together.

I pinched the interfaced fabric loop down the middle to form a bow, and hot glued it onto the headband. I also hot glued the ribbon around all of it to keep it together.

Red bow on a brown wig and wig head

And that’s it! Pretty simple! (Oh, and the wig is the Priscilla in Dark Brown from Arda Wigs!)