Looking back on my progress pictures of the shoes, I’ve realized I didn’t take as many as I had planned to, so I will do my best in explaining! Half of the materials used were just chosen because I happen to have them around.
The materials!
– flip flops
– fabric: dark blue and purple (or blue)
– bias tape: yellow (double fold), white, dark blue, black
– 8 yellow buttons
– craft foam
– glue: hot glue and fabric glue
– heat n bond (or interfacing)
Yes, I know hot glue and fabric glue aren’t the best adhesives for footwear, but… they worked and the shoes haven’t fallen apart yet!
I started by putting craft foam on the flip flops as support for the fabric to lay on. I did leave the flip flop straps in for extra support. I just cut the craft foam into the shape I wanted and hot glued them on.
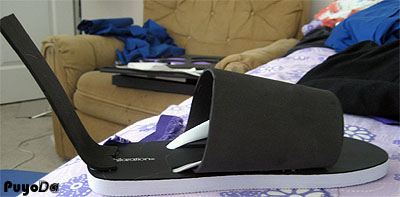
Next was attaching the purple part. The fabric is double layered, stuck together with heat n bond. I only did that because I needed it to be stiff, and heat n bond happened to be stiffer than the interfacing I had at the time. I just hot glued it to the front of the shoe and on top of the craft foam.
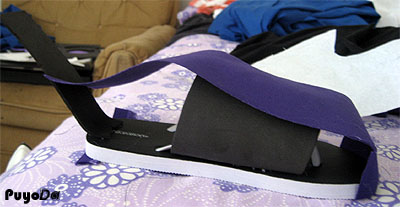
I drafted a pattern for the dark blue parts and duplicated it. (These also are double layered with heat n bond.) I sewed the 2 parts together in the back, and then glued them to the flip flop and the 2 craft foam pieces. Please note that the dark blue parts do not cover the front completely. The purple part still needs to show.
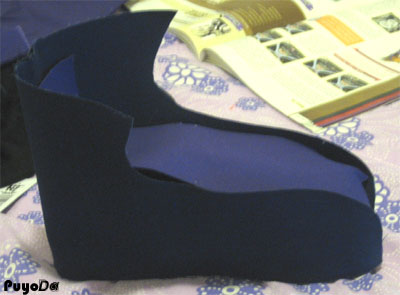
Next I used fabric glue to attach the dark blue and purple part together. If you have problems curving the fabric, try cutting slits into it.
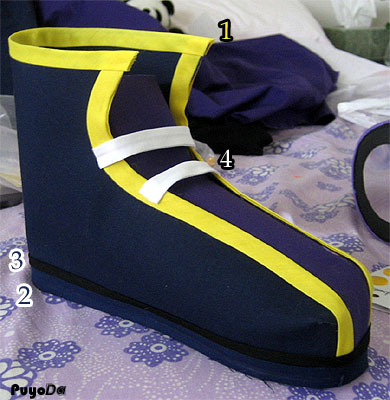
Now for the bias tape explanations, which all use fabric glue:
1. I glued yellow bias tape to cover where the dark blue and purple parts meet and traced it all the way up to the top of the shoe. I then used it to outline the opening of the shoe at the top (this is why yellow needed to be double fold).
2. Dark blue bias tape, the same color as the fabric, is used to cover the very bottom part of the shoe. If you look at Neku’s shoes, you’ll see the yellow and purple parts do not reach the bottom of the shoe. So, this dark blue bias tape covers that.
3. I just wanted to make a visual separation, so I added a thin black bias tape above the dark blue one.
4. White bias tape is used for the laces. It’s not glued to the purple part at all. It just has glue at each end.
The last part is getting the rest of the shoe laces on. I used white bias tape and glued them to make a loop. I then sewed a yellow button onto it, and glued that whole part to the end of one lace. Do this 4 times per shoe.
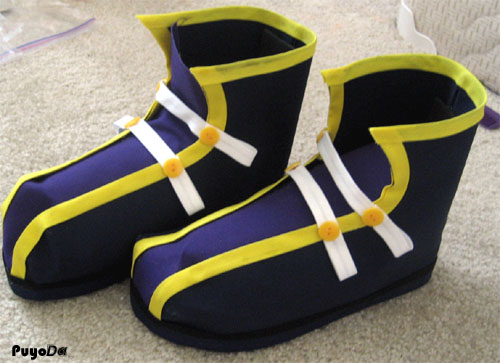
That’s it! These shoes have already survived a long day at one con, and I’m hoping it’ll survive a few more.
